Roti is traditional flat bread that’s made in India. East Indians brought roti and curry with them during their immigration to the West Indies. Due to larger East Indian population, Trinidad and Guyana are well known for their roti and curry dishes. On the other hand, the East Indian population in Barbados is not as large therefore there was less of an Indian cultural influence on Barbadian food.
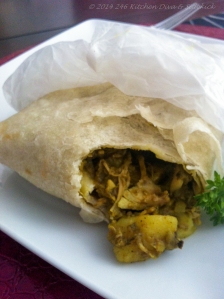
Ok, so let me confuse you guys a bit here. Bajans refer to roti as roti skin and a roti is a roti skin that has been filled with a curry filling and wrapped much like a burrito. Bajans typically go to a popular chain restaurant where they indulge in chicken potato rotis, beef and potato, etc. Having moved away from the Caribbean meant I would occasionally crave the food I remembered from home. I had two choices – go to a West Indian restaurant for roti (which could get quite expensive) or learn to make them.
I decided I needed to learn how to make rotis (roti skins to Bajans) so I would pick the brains of my Trini, Guyanese and East Indian friends. I kept this up until I arrived at a recipe that I was happy with. I was immediately transported my days at Westbury Primary where a lady named Sonya who lived next to the school’s pasture used to make them and sell them to the kids at lunch time. I would help Sonya by distributing the rotis while she was packing up other food orders. Some days I was rewarded with an extra chicken and potato roti much to my liking. Give this a try and hopefully you enjoy it as much as I do.
Ingredients
645 g all-purpose flour
4 tsp baking powder
¼ tsp sea salt
2 cups water, lukewarm
1 tbsp canola oil
1/3 cup canola oil
1 tbsp butter, soften
Method
1. Combine 1/3 cup of oil with the butter in a small bowl and set aside.
2. In a large bowl add flour, baking powder and salt. Use a whisk to combine.
3. Add water to the flour mixture and knead until it’s well incorporated but do not over-knead.
4. Add the 1 tbsp of oil and knead it into the dough.
5. Cover bowl with plastic wrap and let rest for 30 minutes.
6. Divide the dough into 6 equal parts. (Each time I make this recipe I get 191 g of dough for each roti)
7. Shape each section into a ball then roll out into a circle about 10 inches in diameter.
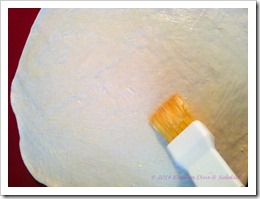
8. Use a pastry brush and lightly brush the dough with the butter/oil mixture that was set aside earlier.
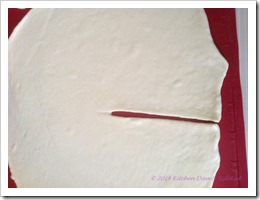
9. To make this next part easy to understand think of a clock face. Use a knife to cut from the center of the clock straight across to the edge in the 3 o’ clock position.
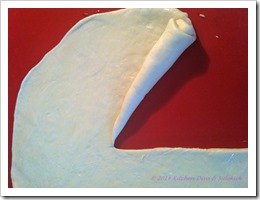
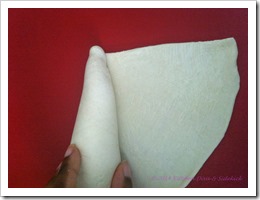
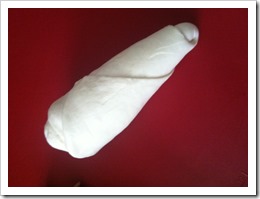
10. Next we need to form a cone from this dough in order to form the flaky layers. To accomplish this, lift the edge and roll tightly. I find it easier to go anti-clockwise. If clockwise works for you then roll in that direction.
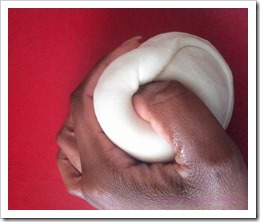
11. When the dough is fully rolled into a cone, hold it in your hand with the thin side pointed down. Grasp the outer edge pull up and stuff into the center so it looks like a ball.
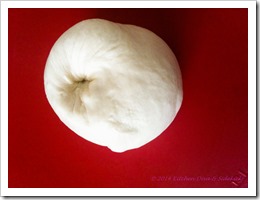
12. Flip the dough over and push the pointed end into the centre of the dough to complete the ball.
13. Finish the remaining dough in the same manner. Let the dough rest covered for about an hour.
14. Have your tawa or griddle heated and ready at the end of the hour. Oil it using a pastry brush.
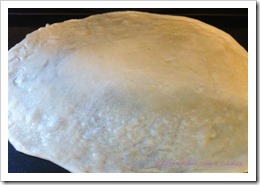
15. Roll the dough ball out as thin as possible without tearing it. For this amount of dough I usually get rotis about 12 inches in diameter.
16. Place rolled out dough on the tawa or griddle and brush with oil. You will need to regulate the heat as necessary. When cooked on the one side, carefully flip, brush well with oil and let cook.
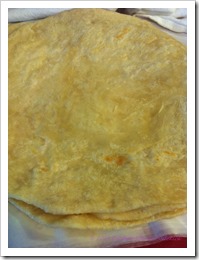
17. In order to get the buss up shut (busted up shirt/shredded) look you will need to clap the cooked roti between your hands or with a wooden spoon. This will cause the layers to separate giving you the torn look. Alternatively, you can drop the roti in a clean towel and hit it with a wooden spoon or spatula. This is best if you are going to use the roti for dipping purposes.
18. I prefer to use my roti (roti skins) as a wrapper for my curry filling so keep the clapping of the roti to a minimum causing some of the layers to separate but it still retains its integrity so it can be filled.
TIPS:
- Try these rotis with any curry like chicken, chicken and potato, beef, beef and potato, shrimp
- Place wax paper between each roti and freeze in a ziplock container. Thaw in fridge before reheating.
- To reheat, place in microwave and heat in 15 seconds intervals on power level 8 (80% of full power) until hot.
- A tawa/tawah is a round flat cooking surface used to make rotis.
This recipe developed and tested by 246 Kitchen Diva. All photographs and text on this website are subject to copyright ©2014 246 Kitchen Diva & Sidekick, unless otherwise indicated. All rights reserved. All trademarks are owned by their respective companies. For any use of the content from this website, please contact us using the form on the Contact us tab.


love it ty but got lost on the wrap
Explain what exactly you got lost on and perhaps I can help you. 🙂
excellent methood for making good recipe
Thank you very much 🙂